


Mastering the art of how to make a latte with an espresso machine is a rewarding skill that transforms your morning routine into a café-quality experience. A classic latte is defined by its smooth, velvety texture and the delicate balance between a robust shot espresso and a generous amount of steamed milk.
Unlike a cappuccino, which focuses on a thick layer of airy froth, the perfect latte relies on “micro-foam“—tiny, uniform bubbles that integrate seamlessly with the coffee to create a silky, sweet finish. Whether you are using a professional-grade setup or a home-friendly espresso machine, the principles of extraction and milk texturing remain the same.
Understanding the Foundation of a Great Latte
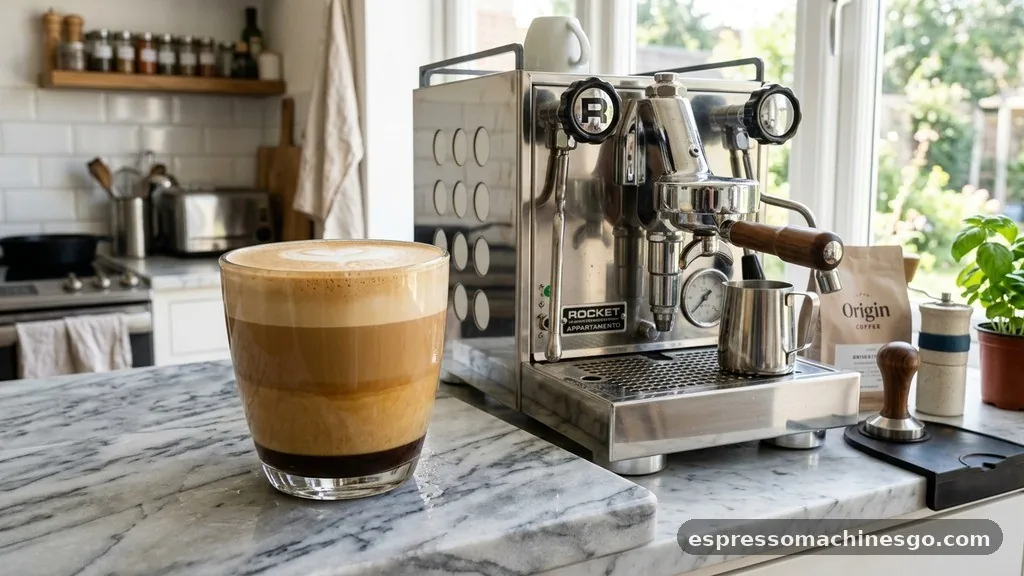
To successfully make a café-style beverage, you must first understand the components that constitute a latte. At its core, the drink consists of one or two shots of espresso topped with a significant portion of steamed milk and a very thin layer of foamed milk.
The ratio is critical; a typical latte uses roughly one part espresso to three or four parts milk. This dilution is what distinguishes it from a flat white or a cortado.
The quality of your strong coffee base starts with fresh beans. Ensure your espresso machine is preheated, as the temperature of the portafilter and the group head significantly impacts the extraction. If the machine is cold, the water temperature will drop during the brewing process, leading to a sour or under-extracted shot.
You should always try to use a burr grinder to achieve a consistent, fine grind size, which is essential for creating the resistance needed for a proper 25-30 second extraction. If your grind is too coarse, the water will pass through too quickly, resulting in a weak, watery cup that lacks the body required to stand up to the milk.
Selecting and Preparing Your Equipment
Before you begin, ensure your maker and tools are clean. A residual buildup of coffee oils can impart a rancid flavor to your drink.
You will need a stainless steel pitcher for milk, a tamper, and your espresso machine. The size of your pitcher matters; it should be large enough to hold the milk while leaving room for the expansion caused by the steaming process.
When you want use your machine, start by flushing the group head with a short burst of water. This clears any old grounds and stabilizes the temperature. Next, grind your beans fresh.
A standard double shot uses approximately 18 to 20 grams of coffee. Distribute the grounds evenly in the portafilter basket and use your tamper to apply firm, level pressure.
A crooked tamp will lead to “channeling,” where the water finds the path of least resistance, resulting in an uneven extraction. You can learn more about the technical standards of espresso preparation through the Specialty Coffee Association, which serves as the global authority on coffee science and standards.
The Art of Steaming Milk for Micro-foam
Creating the signature texture of a latte requires a specific technique often referred to as “stretching” and “texturing.” To begin, purge your steam wand to remove any condensation.
Submerge the tip of the wand just below the surface of the milk in your pitcher. As you turn the steam on, you should hear a gentle, rhythmic tearing sound—this is the sound of air being incorporated into the milk to create foam.
Once the milk volume has increased by about 30% and the pitcher feels warm to the touch, submerge the steam wand slightly deeper to stop the “stretching” phase. Now, focus on creating a vortex to integrate the bubbles. Keep the wand at an angle to ensure the milk spins like a whirlpool.
This is the important step that converts large, unsightly bubbles into the silky, paint-like micro-foam that defines a perfect latte. Turn off the steam before removing the wand, and immediately wipe it down with a damp cloth to prevent milk from hardening on the nozzle. Tap the pitcher on the counter to pop any remaining large bubbles, and swirl the milk gently to maintain its glossy sheen.
Executing the Perfect Pour
The pour is where the coffee and milk finally meet. Start by holding your cup at a slight angle. Begin pouring the milk into the center of the espresso shot from a height of about two or three inches.
This allows the milk to dive beneath the crema, ensuring the base of the drink is a uniform, creamy mixture. As the cup fills, bring the pitcher closer to the surface.
If you are aiming for latte art, this is the moment to tilt the pitcher and allow the foam to “ride” on the surface of the coffee. The contrast between the dark espresso crema and the white micro-foam creates the patterns you see in high-end cafés.
If you are not yet focused on art, simply ensure that the milk and espresso are thoroughly integrated. The final drink should feel heavy and consistent, with no separation between the liquid milk and the foamed milk on top.
Common Variations and Customizations
Once you master the standard latte, you can experiment with various flavor profiles. Adding a syrup is the most common way to customize your drink.
Whether it is vanilla, caramel, or hazelnut, always add the syrup to the cup before pulling your shot of espresso. The heat from the fresh coffee helps dissolve the syrup, ensuring the flavor is distributed evenly throughout the drink.
For those who prefer a colder option, an iced latte is a refreshing alternative. To make one, pull your espresso shot into a glass filled with ice. The cold ice will cool the coffee instantly.
Then, pour your cold, textured milk over the top. While you don‘t need to steam the milk for an iced version, many professionals still give it a quick “stretch” with the steam wand to add a bit of aeration, which provides a creamier mouthfeel even when served cold.
| Drink Type | Espresso Amount | Milk Texture | Primary Characteristic |
|---|---|---|---|
| Latte | 1-2 Shots | Micro-foam | Creamy and smooth |
| Cappuccino | 1-2 Shots | Thick, airy foam | Textured and bubbly |
| Flat White | 2 Shots | Very thin micro-foam | Strong coffee flavor |
Troubleshooting Your Latte Making Process
If your latte doesn’t taste quite right, consider these common pitfalls. If the drink tastes bitter, your espresso might be over-extracted, or your beans might be roasted too dark.
If it tastes sour, your shot is likely under-extracted, meaning the water moved through the grounds too quickly. Always keep a log of your grind settings and extraction times to identify what needs adjustment.
If your milk isn’t reaching the right consistency, check your steam pressure. Some home machines struggle to provide enough power for consistent texturing. If the milk is too thin, you didn’t spend enough time in the “stretching” phase.
If it is too bubbly, you likely held the wand too close to the surface for too long. Practice is the only way to overcome these hurdles.
- Ensure your espresso machine is fully heated before starting.
- Use fresh, cold milk for the best steaming results.
- Always purge your steam wand before and after each use.
- Clean your portafilter thoroughly between every single shot.
- Use a digital scale to measure your coffee dose for consistency.
Addressing Topical Gaps: Advanced Home Barista Techniques
Many users wonder if they can achieve cafe-quality results with entry-level machines. The truth is that while professional machines offer better temperature stability, a dedicated home barista can really improve their results by focusing on technique rather than just hardware.
One common gap in information is the impact of water chemistry. Using filtered, mineral-balanced water is just as important as using high-quality beans; hard water can lead to scale buildup in your boiler, which ruins the flavor profile of the espresso over time.
Another nuance is the “resting” period of the beans. Freshly roasted coffee contains a high amount of carbon dioxide.
If you try to pull a shot immediately after roasting, the gas will cause the espresso to bubble excessively and prevent a proper extraction. Aim to let your beans rest for at least 7 to 10 days after the roast date to allow for the best flavor development.
Finally, consider the temperature of your serving cup. A cold ceramic mug will sap the heat from your latte instantly, causing the milk proteins to collapse and the texture to lose its integrity.
Preheating your cup with a splash of hot water from your machine is a small, often overlooked step that ensures your latte stays at the optimal drinking temperature for longer. By mastering these finer details, you elevate your home coffee game from simple caffeine delivery to a refined sensory experience.
Frequently Asked Questions
Is a latte just an espresso with milk?
A latte is more than just espresso and milk; it is specifically defined by the integration of steamed milk and a thin layer of micro-foam. While it starts with espresso, the technique used to texture the milk is what separates a true latte from simple coffee with milk.
What is the ratio of espresso to milk for a latte?
The standard ratio for a latte is typically one part espresso to three or four parts steamed milk. This provides enough volume to dilute the intensity of the espresso while maintaining a rich, creamy texture, making it much smoother than a macchiato or a traditional cappuccino.
Do you pour milk or coffee first for a latte?
You should always pull your shot of espresso into the cup first. Once the espresso is ready, you pour the steamed milk directly into the coffee. This order ensures that the crema—the golden oil on top of the espresso—is incorporated into the milk for a better flavor.
How many shots of espresso are in a standard latte?
A standard latte typically contains one or two shots of espresso, depending on the size of the cup and your personal preference. Most coffee shops use a double shot as the baseline for a 12-ounce latte to ensure the coffee flavor remains prominent against the milk.