

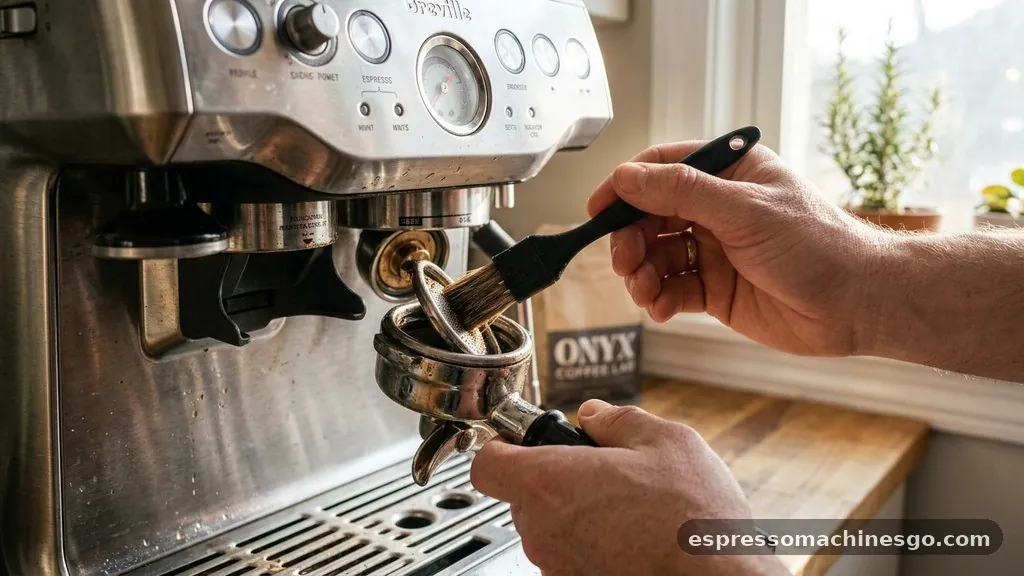
Maintaining your home espresso setup is the secret to pulling that elusive perfect cup every single morning. If you have invested in a high-quality machine, you likely want to ensure it lasts for years while continuing to produce café-quality beverages. Learning how to clean Breville espresso machine models is not just about hygiene; it is about performance.
Over time, coffee oils, mineral deposits, and old grounds accumulate inside the internal components, which can obstruct water flow and impart a bitter, rancid taste to your espresso. By following a structured maintenance routine, you protect the internal pump, the boiler, and the group head from premature wear, ensuring your machine remains a reliable barista companion for years to come.
Understanding the Importance of Regular Maintenance

A clean machine is the foundation of great coffee. When you neglect the routine care of your equipment, the internal parts begin to suffer from buildup. This residue is primarily composed of coffee fats and mineral scale from your water supply.
These oils are sticky and, if left to sit, will turn rancid, tainting the flavor profile of every shot you pull. Furthermore, scale deposits can clog the narrow pipes and solenoid valves that govern water pressure. When your machine struggles to push water through the portafilter, the extraction becomes inconsistent, leading to sour or overly bitter shots.
Beyond flavor, there is the functional aspect of the cleaning cycle. Modern Breville units are sophisticated pieces of engineering. They are designed to alert you when maintenance is needed.
When your machine notify system triggers, it is essentially telling you that the internal sensors have detected a drop in performance or a time-based threshold has been crossed. Ignoring these warnings is a primary cause of mechanical failure.
By keeping up with regular maintenance—such as flushing the group head after every use and performing deep cleans when prompted—you ensure that the thermal stability and pressure control remain within factory specifications. Think of it as an oil change for your car; it keeps the engine running smoothly and prevents catastrophic breakdowns.
The Essential Cleaning Cycle for Group Heads
The most frequent task you will perform is the backflush, which is the cornerstone of keeping the group head pristine. This process uses a cleaning tablet to dissolve the hardened coffee residue trapped inside the dispersion screen and the three-way solenoid valve. To initiate this, you will need a blind filter basket—a solid disc without holes—which is typically included with your machine.
To execute the process, place the tablet into the blind basket, lock the portafilter into the group head, and engage the machine’s automated cleaning cycle. The water will build up pressure against the blind disc and be forced backward through the internal valves, effectively scrubbing the lines clean. It is a simple but crucial step that prevents the accumulation of old coffee particles.
You should aim to do this whenever the machine indicates it is time, or at least once every few weeks if you are a heavy user. Always rinse the machine thoroughly after the cycle completes to ensure no chemical residue remains for your next shot. This habit ensures that the water path remains clear and the pressure remains stable during every extraction.
Descaling: Removing Mineral Buildup
While backflushing cleans the coffee path, descaling is the process of removing calcium and magnesium deposits from the boiler and heating elements. These minerals, often called scale, are present in tap water and can build up quickly depending on your local water hardness.
If you want to find perfect results consistently, you must address this hidden problem. Over time, scale acts as an insulator, making the heating element work harder to bring water to the correct temperature, which can lead to longer heat-up times and inconsistent thermal performance.
You can use a specialized descaling solution or a commercial-grade citric acid-based cleaner. While some users ask if they can use vinegar, most manufacturers recommend against it due to the potential for the acidic odor to linger in the internal tubing. It is safer to stick to approved solutions to protect the delicate seals and gaskets inside your machine.
To descale, you fill the water tank with the mixture and run it through the group head and the steam wand. This ensures that every internal pathway is treated. For a deeper look into water quality, you can review the EPA guidelines on drinking water quality to understand why mineral content varies by region and how it impacts your appliances.
| Task | Frequency | Purpose |
|---|---|---|
| Backflushing | Every 200 shots/monthly | Removes oil and coffee residue |
| Descaling | Every 3-6 months | Removes mineral/scale buildup |
| Steam Wand Purge | After every use | Prevents milk blockage |
| Water Filter Change | Every 2-3 months | Reduces scale accumulation |
Maintaining the Steam Wand and Milk System
The steam wand is often the most neglected part of an espresso machine, yet it is the most prone to bacterial growth and blockages. Because milk is a protein-rich substance, it can bake onto the hot metal of the wand if not wiped down immediately after steaming. If you allow milk to dry on the nozzle, it will eventually clog the steam holes, reducing the wand’s power and making it impossible to create that silky microfoam required for latte art.
To keep it in top shape, always purge the wand for two seconds before and after steaming to clear any condensation or milk trapped inside. If you do notice a blockage, use the small cleaning tool provided with your machine to gently clear the holes. For a deeper clean, soak the removable tip in warm water mixed with a mild espresso machine cleaner.
This removes the stubborn, caked-on proteins that a simple wipe cannot reach. A clean steam wand is not only sanitary but also ensures that your steam pressure remains consistent, which is vital for achieving the correct texture for your milk-based drinks.
Addressing Common Topical Gaps
Many owners struggle with issues that are not always covered in basic manuals. One common question is: “What if my machine is still dirty after the cycle?” This usually happens because the group head screen is physically clogged with fine sediment.
You can remove the screen using a screwdriver to scrub it manually with a stiff brush. Another common issue involves the water tank filter.
If you do not keep the water tank clean, algae can grow, which ruins the water quality. Wash the tank with mild soap once a week and rinse it thoroughly.
Another gap is the portafilter itself. Users often clean the basket but forget the underside of the portafilter head. Over time, oils accumulate in the spouts, leading to a stale flavor.
Soak the metal part of the portafilter (never the plastic handle, as the heat can degrade it) in a bowl of hot water and cleaning powder for 30 minutes. This will strip away the black, oily buildup that scrub brushes cannot reach.
Finally, ensure your grinder is calibrated. If your grounds are too coarse or too fine, it can lead to uneven extraction, which stresses the machine’s pump and makes the cleaning cycle less effective.
Best Practices for Long-Term Machine Health
To ensure your machine lasts for the long haul, consider your water source. If your tap water is very hard, consider using filtered or bottled water with a balanced mineral content. This will significantly extend the time between descaling cycles.
Furthermore, establish a routine. If you wait for the machine to tell you it needs cleaning, you are often already dealing with a performance drop. Set a calendar reminder to perform a deep clean once a month, regardless of whether the light is on.
When you are finished with your cup take, always ensure the machine is powered off and the portafilter is removed. Leaving a damp, hot portafilter in the group head creates a humid environment that can encourage mold growth and keep the group head seal under unnecessary pressure. By treating your espresso machine as a precision instrument, you guarantee that it will continue to provide you with the quality you expect.
Consistency in your cleaning routine is the single most effective way to protect your investment and maintain the integrity of your daily coffee ritual. Following these steps will ensure you are always ready for your next caffeine fix.
Frequently Asked Questions
- Can I use vinegar to descale my Breville? While vinegar is acidic, it is generally not recommended as it leaves a strong, lingering scent and can be too harsh for certain internal seals. Use a dedicated espresso machine descaling powder instead for better results and longevity.
- How do I know when the machine needs a cleaning cycle? Most modern Breville models feature a “Clean Me” or “Descale” indicator light that illuminates when the internal sensors detect that the machine has reached a specific usage threshold. Always follow these prompts to prevent internal buildup.
- Is it necessary to use official Breville cleaning tablets? While official tablets are tested to be safe and effective for your specific machine’s pump and boiler components, any high-quality espresso machine cleaning tablet will work, provided it is designed for backflushing and does not contain abrasive particles.
- How often should I replace the water filter? You should replace the water filter in your tank every two to three months, depending on your water usage and hardness. This simple step significantly reduces the amount of mineral buildup in your boiler, making deep descaling less frequent.