

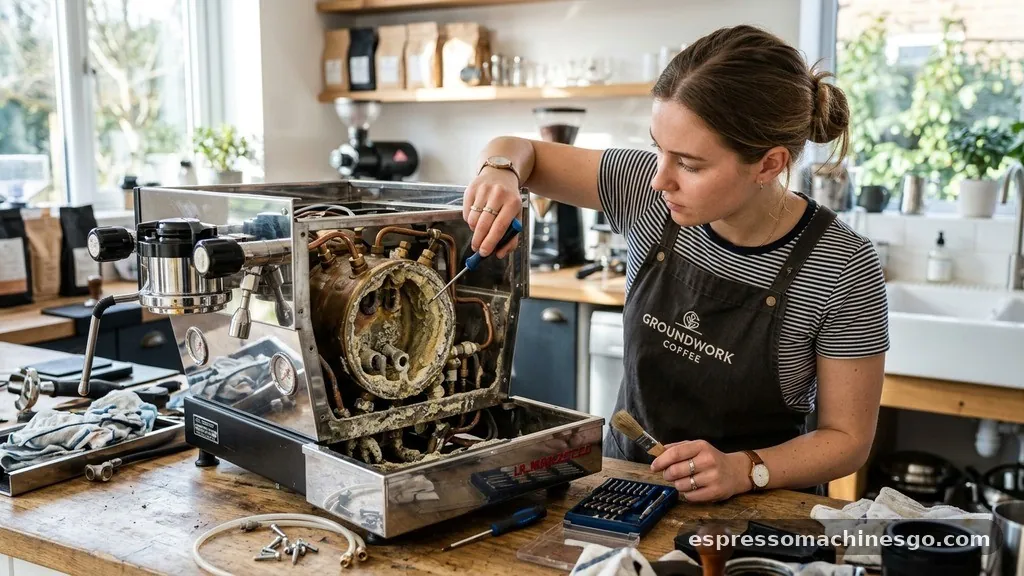
Maintaining your coffee equipment is the secret to achieving that perfect café-quality shot in your own kitchen. If you have been wondering how to descale Breville espresso machine models, you are already on the right path to extending the lifespan of your appliance. Over time, the internal components of your machine naturally accumulate minerals build-up, primarily calcium and magnesium from your local water supply.
This residue can coat your heating elements, causing the machine to struggle with temperature stability and eventually leading to inconsistent flavor profiles in your coffee brew. By implementing a regular maintenance routine, you ensure that every cup you pull is as rich and aromatic as the first one you enjoyed after unboxing.
Understanding the Importance of Regular Descaling
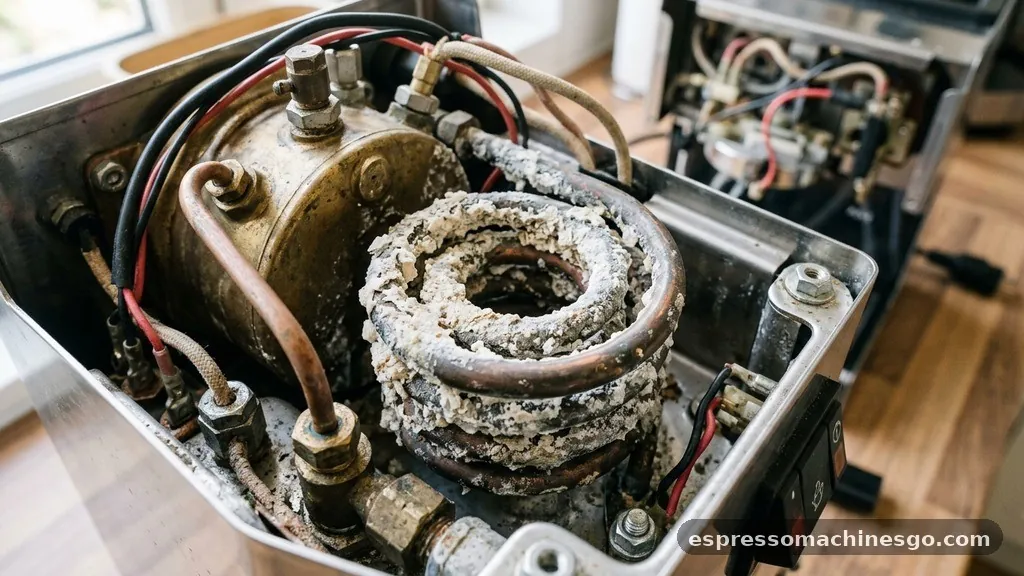
To keep your machine running at peak performance, you must understand why mineral accumulation is the enemy of a consistent extraction. When water is heated, it undergoes a chemical change that causes dissolved solids to precipitate out of the liquid and adhere to the metal surfaces inside the boiler or thermocoil.
This layer of scale acts as an insulator, forcing the heating elements to work harder and longer to reach the necessary brewing temperature. Eventually, this extra strain can lead to premature failure of internal sensors and pumps, which is why learning how to descale your unit is a fundamental skill for any home barista.
Beyond the mechanical health of the machine, scale affects the taste of your beverage. As water passes through the internal tubes, it picks up particles from the accumulated mineral crust. This often results in a dull, metallic, or bitter taste that masks the complex notes of your specialty beans.
Furthermore, if you notice your flow rate has slowed to a trickle or the machine is making louder, more strained noises during operation, it is a clear sign that the internal pathways are partially blocked. Addressing this promptly ensures your espresso remains clean, vibrant, and true to the roast profile of your chosen beans.
Preparation and Essential Tools for the Process
Before you begin the process of cleaning your machine, you need to gather the correct supplies. While some users search for alternatives, using a high-quality, manufacturer-recommended descale machine solution is the safest way to dissolve calcium without damaging the delicate internal gaskets and valves.
These specialized formulas are designed to be effective against tough mineral deposits while remaining food-safe once properly rinsed. You should also ensure you have a large container that can hold at least two liters of liquid, as you will be flushing the machine repeatedly during the cycle.
It is also vital to remove the water filter from the reservoir before you start. Many users forget this step, which effectively renders the descaling solution useless as the filter will trap the active ingredients.
Once the filter is removed, empty the tank completely and ensure the drip tray is also empty to avoid overflow. Having a microfiber cloth nearby is also helpful for wiping down the exterior and the steam wand, ensuring that no residue is left on the surfaces where you place your cup or handle the portafilter.
Step-by-Step Procedure for Breville Models
The specific steps for how to descale Breville espresso machine variants can vary slightly depending on whether you have a Barista Express, a Bambino, or an Oracle, but the core logic remains consistent across the brand. The following steps provide a general framework for most modern units.
1. Prepare the solution according to the package instructions, mixing the concentrated powder or liquid with the specified amount of warm water in the reservoir.
2. Ensure the machine is turned off, then enter the descaling mode—usually triggered by holding down specific buttons like “Power” and “Program” simultaneously for several seconds until the lights indicate the mode is active.
3.
Place your large container under the group head and the steam wand.
4. Run the descaling cycle, which allows the acidic solution to sit in the heating elements and dissolve the mineral buildup.
5.
Once the solution has passed through, rinse the reservoir thoroughly with fresh, filtered water.
6. Run at least two full tanks of clean water through the system to flush out any remaining traces of the descaling agent.
This sequence is crucial because it ensures that the acidic solution doesn’t linger inside the machine. If you leave even a small amount of descaler in the system, it will impart a harsh, chemical taste to your next coffee brew, which is why the final rinse is just as important as the cleaning phase itself.
Comparing Descaling Options
Selecting the right method for maintenance can be confusing given the variety of advice available online. The table below compares the most common approaches to help you decide on the best path for your specific situation.
| Method | Effectiveness | Safety/Risk | Ease of Use |
|---|---|---|---|
| Manufacturer Descaler | High | Low Risk | Simple |
| Citric Acid Powder | Medium/High | Moderate Risk | Requires Mixing |
| White Vinegar | Low | High Risk (Corrosion) | High Odor |
As shown in the table, using a purpose-built solution is the most balanced approach. While some people suggest using vinegar, it is often too acidic for the rubber seals inside high-end machines and leaves a lingering smell that is notoriously difficult to remove from the internal tubing. For more information on why proper water chemistry is essential for your machine, you can consult the Specialty Coffee Association guidelines on water quality for brewing.
Addressing Common Descaling Challenges
Many users find that even after following the instructions, the machine does not seem to function perfectly. One common issue is that the “Descale” light remains illuminated even after the cycle is complete. This usually happens because the machine’s internal software requires a specific number of flushes to register that the minerals build has been cleared.
If this happens, try running an extra cycle of clean water through both the steam wand and the group head. If the light persists, ensure you are holding the buttons for the required duration to signal the completion of the state.
Another challenge is the presence of airlocks in the pump. If you have let the reservoir run completely dry during the descaling process, the pump may struggle to prime itself with the fresh water rinse.
If you suspect an airlock, try opening the steam wand valve and running the hot water function to help push the air bubble out of the system. This is a common hurdle, but it is easily resolved with a bit of patience and by keeping a close watch on the water levels throughout the maintenance task.
Topical Gaps: What Most Guides Miss
When discussing how to descale Breville espresso machine units, most guides focus exclusively on the mechanics of the buttons and the liquid. However, they often ignore the role of the water filter in preventing future issues. If you live in an area with particularly hard water, simply descaling every three months might not be enough.
You should consider using an external water softening pitcher or a reverse osmosis system if your tap water has a high TDS (Total Dissolved Solids) count. By treating the water before it enters the reservoir, you can significantly reduce the frequency with which you need to remove scale, thereby preserving the life of the machine’s internal components.
Additionally, many users fail to address the steam wand’s internal buildup. Even if the machine’s main boiler is clean, the steam wand can accumulate milk proteins and mineral scale, which can lead to a drop in steam pressure.
To properly maintain this part, you should perform a steam purge after every use and occasionally soak the tip in a specialized milk-system cleaner. This proactive approach ensures that the steam wand remains free of blockages, allowing you to create that silky, micro-foam texture that is vital for a great latte or cappuccino.
Optimizing Your Machine for Longevity
Ultimately, the goal of learning how to descale your machine is to ensure that your investment lasts for years. A well-maintained machine is a great asset in any kitchen, providing a consistent, high-quality experience every morning.
Beyond the descaling process, regular backflushing with cleaning tablets is an essential step to keep the group head and solenoid valves free of coffee oils. These oils can turn rancid over time, negatively impacting the flavor of your espresso even if the machine is free of mineral scale.
Create a maintenance calendar to track your efforts. For most users, a full descale is needed every three months, while backflushing should happen much more frequently—ideally after every 50 to 100 shots.
By keeping a log of when you last performed these tasks, you remove the guesswork and can see it’s time to act before performance begins to dip. Remember that your machine is a complex piece of engineering; treating it with the care it deserves will be rewarded with years of exceptional coffee.
FAQ Section
How often should I perform a full descale on my machine?
Generally, you should descale your machine every three months, or more frequently if you live in an area with very hard water. Always check your specific manual, as some models have sensors that will notify you when it is time to perform the maintenance.
Can I use vinegar to clean my Breville?
It is not recommended. Vinegar is highly acidic and can corrode the internal rubber seals and metal components of your espresso machine. Additionally, the strong, lingering odor of vinegar is notoriously difficult to rinse out, which will negatively affect the taste of your future coffee brews.
Why is my machine still showing a descale warning after I finish?
This usually indicates that the machine’s internal sensor has not registered the completion of the cycle. Try running an additional full tank of fresh water through both the steam wand and the group head, and ensure you have followed the specific “exit mode” sequence for your model.
Does the water filter need to be removed before descaling?
Yes, you must remove the water filter from the reservoir before starting the descale process. The filter will absorb the descaling solution, preventing it from effectively cleaning the internal pathways. Always replace the filter with a new one once the entire descaling and rinsing process is finished.