


Mastering the art of texturing milk is the defining skill that separates a standard home coffee setup from a true café-quality experience. Learning how to steam milk with espresso machine equipment involves far more than just heating liquid; it is a precise exercise in fluid dynamics, thermodynamics, and sensory awareness. When done correctly, the process transforms thin, cold milk into a silky, sweet, and stable microfoam that acts as the canvas for latte art and provides the luxurious mouthfeel characteristic of a perfect flat white or cappuccino.
The Science of Milk Texturing and Microfoam 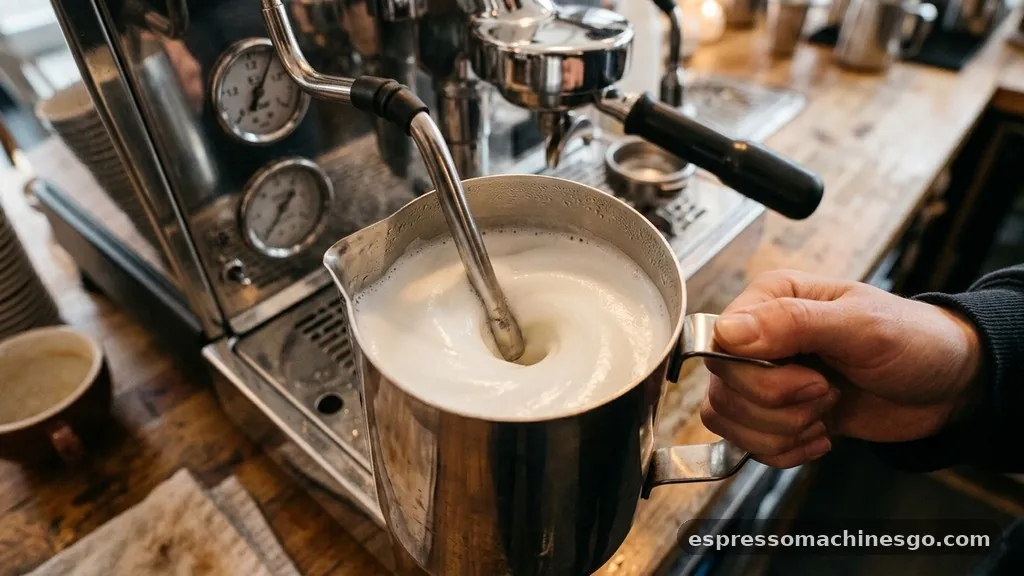
Steaming milk is essentially the process of introducing air into the liquid while simultaneously heating it to denature the proteins and emulsify the fats.
To produce high-quality microfoam, you must perform two distinct phases: stretching and texturing. During the initial stretching phase, you introduce small amounts of air to create bubbles. During the texturing phase, you create a vortex that breaks these bubbles down into a microscopic, uniform structure.
The steaming process relies heavily on the steam wand of your machine. As steam is released, it creates a high-velocity jet that pulls air into the milk. If the air bubbles are too large, the foam will be dry and airy, similar to a traditional cappuccino; if they are microscopic, you achieve the glossy, paint-like texture required for modern specialty coffee.
Achieving this balance requires careful management of the temperature and the angle of your milk pitcher.
Essential Equipment and Preparation
Before you begin, ensure your tools are clean and your workspace is prepared. Using a cold, stainless steel pitcher is non-negotiable because it provides the necessary thermal feedback, allowing you to gauge the temperature of the milk through the metal.
* Milk Pitcher: A 12-ounce or 20-ounce stainless steel vessel is ideal for most home setups.
* Cold Milk: Always start with fresh, cold milk straight from the refrigerator. The lower starting temperature provides a wider window of time to work before the milk reaches the scald point.
* Steam Wand: Ensure the wand is purged of any residual water before you insert it into the pitcher.
* Temperature Control: Aim to stop steaming when the pitcher becomes too hot to touch comfortably for more than a second, usually around 140°F to 150°F.
| Milk Type | Fat Content | Steamability | Texture Profile |
| :— | :— | :— | :— |
| Whole Milk | 3.25% | Excellent | Creamy, Sweet, Stable |
| Oat Milk | Varies | Very Good | Thick, Similar to Dairy |
| Almond Milk | Low | Moderate | Thin, Prone to Separation |
| Soy Milk | High | Good | Dense, Fine Bubbles |
Step-by-Step Guide to Steaming Like a Barista
To begin, fill your pitcher with the correct amount cold milk, usually just below the spout’s indentation. Purge the wand milk mechanism to clear out condensation, then position the tip just below the surface of the milk.
Turn the steam valve on fully. You should hear a gentle, rhythmic tearing sound—this is the sound of air being incorporated.
Once you have stretched the milk for a few seconds and the volume has increased slightly, submerge tip of the wand deeper into the milk to stop the intake of air. Tilt the pitcher slightly to create a strong, circular vortex. This movement is critical; it folds the air bubbles into the liquid, smoothing out the texture.
Keep the wand off-center to maintain this whirlpool. Continue this until the pitcher becomes hot to the touch, then shut off the steam before removing the wand. Always wipe the wand immediately with a damp cloth to prevent milk solids from baking onto the metal.
Addressing Common Steaming Challenges
Many home baristas struggle with inconsistent results, often due to poor positioning or improper timing.
If your milk ends up with large, soapy bubbles, it means you stayed in the stretching phase for too long. If the milk is hot but lacks any foam, you likely didn’t introduce enough air at the start.
Another frequent issue is the “stale” steam problem, where the wand doesn’t produce enough pressure. This is often caused by a buildup of dried milk inside the nozzle. Regularly cleaning the tip ensures that the tip steam pressure remains consistent.
If you find the milk is heating up too quickly, you may be using too little milk or your steam pressure is set too high for your specific pitcher size. Practice is the only way to build the muscle memory required to adjust the wand towards the correct angle instinctively.
Answering Topical Gaps: Why Steaming Varies
A common point of confusion is whether to steam milk or make espresso first. In a professional setting, we often pull the shot while the milk is steaming to ensure the coffee is fresh.
However, if you are a beginner, it is perfectly acceptable to steam the milk first. Quality microfoam is surprisingly stable; if allowed to sit for 30 to 60 seconds, it will actually settle into a more homogenous, glossy state that is easier to pour.
Another gap involves the use of different milk types. Many people assume dairy is the only option, but plant-based alternatives have evolved significantly. When working with oat or soy, remember that they heat faster than dairy.
You must be more aggressive with your ready-to-stop timing, as these milks can scorch or lose their stability if pushed to the same temperatures as cow’s milk. For a deeper understanding of the chemical properties of milk proteins, you can refer to the science of milk sweetness as documented by food scientists.
Mastering the Pour and Final Texturing
Once your milk is steamed, the final step is the pour. Before you attempt latte art, give the pitcher a firm tap on the counter to pop any surface bubbles, and swirl the milk vigorously.
The goal is to keep the milk and foam integrated so they move as one liquid mass. If you let the pitcher sit for too long, the foam will separate from the liquid, making it impossible to create patterns.
Start by pouring from a height into the center of the espresso shot to create a base. As the cup fills, bring the pitcher tip closer to the surface of the coffee. This transition is where the microfoam begins to “paint” the surface.
By controlling the flow rate and the distance, you can manipulate the white foam to form dots, hearts, or rosettas. It is a subtle using of physics and artistic intuition combined.
Troubleshooting FAQ Why does my milk taste burnt?
The milk likely reached a temperature above 160°F. At this point, the sugars in the milk begin to break down, and the proteins denature, resulting in a flat, bitter, or “cooked” flavor profile.
Always stop steaming when the pitcher feels uncomfortably hot to hold.
Can I re-steam milk that has already been heated?
It is strongly discouraged. Re-steaming milk changes the protein structure and destroys the delicate balance of fats and sugars, leading to a thin, watery, or overly bubbly consistency. Always start with fresh, cold milk for every single drink you prepare to ensure the highest quality results.
Why is my espresso machine not producing enough steam?
This is usually caused by a clogged steam tip or low boiler pressure.
Check that the holes in your steam wand are clear of dried milk. If the machine is older, the boiler may also be suffering from scale buildup, which restricts heat transfer and pressure output.
Should I steam before or after pulling the shot?
If you are skilled, do both simultaneously to ensure freshness.
If you are learning, steam your milk first. High-quality microfoam will hold its texture for a minute or two, giving you the time needed to focus entirely on pulling a perfect, balanced shot of espresso without distraction.